
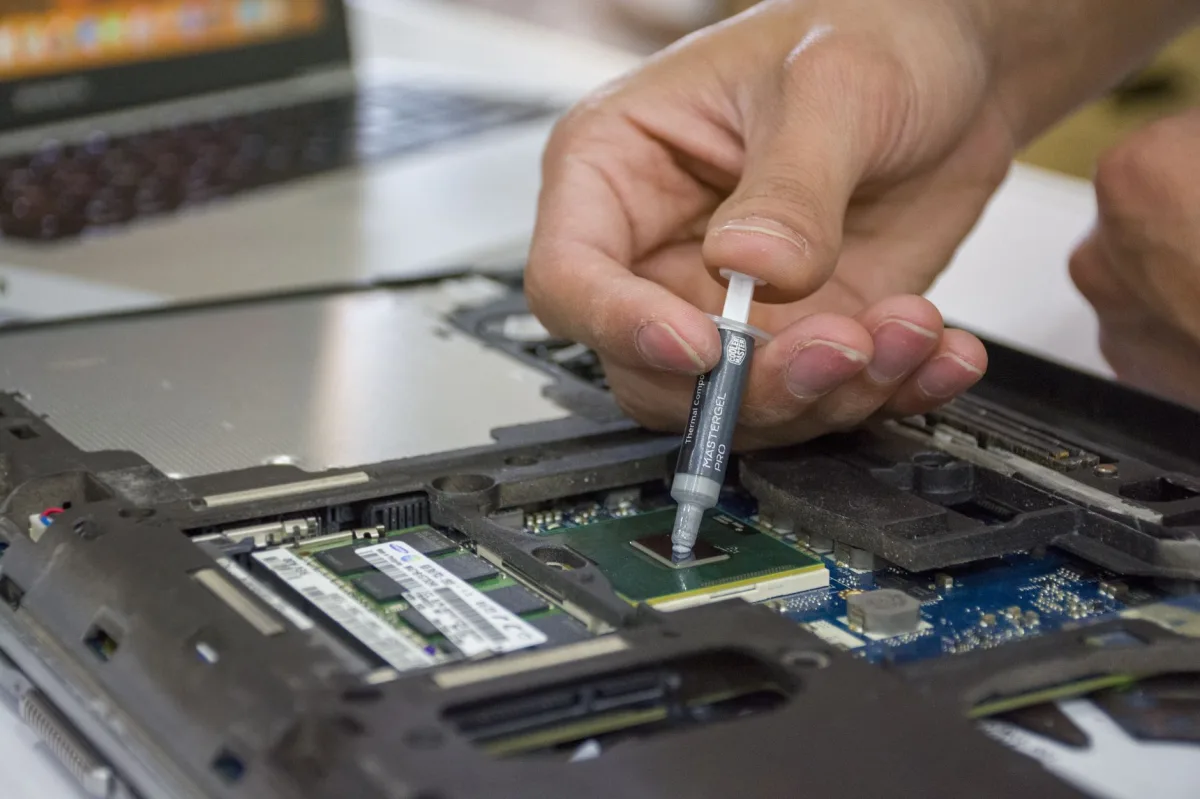
How to apply thermal paste begins with a simple observation from the bench: a thin, uniform film between the processor’s IHS and the cooler can shave several degrees off the temperature curve. In 2026 the importance of that film has grown because modern silicon such as the AMD Ryzen 9 9950X3D and Intel Core i9‑13900K can draw more than 200 W while the die size shrinks. The following guide covers the science, the tools, a step‑by‑step workflow, and the common pitfalls that keep even experienced builders from reaching the lowest possible temps.
Overview: What Is Thermal Paste and Why It Matters
Definition and Function
Definition: Thermal paste is a thermally conductive compound that fills microscopic air gaps between a CPU/GPU’s Integrated Heat Spreader (IHS) and the cooler’s base, dramatically lowering interface resistance.
Heat Transfer Basics
Air conducts at roughly 0.025 W/mK, while a good oxide‑based paste can exceed 8 W/mK. By eliminating air pockets, the paste reduces the total thermal resistance (Rtotal = RCPU + Rpaste + Rcooler) and lets heat flow to the radiator or heatsink faster.
Impact on CPU/GPU Performance
When the IHS‑to‑cooler interface is efficient, the processor can sustain higher boost clocks without throttling. In a real‑world test on an Intel Core i9‑13900K paired with a 360 mm AIO, a proper paste job trimmed idle temps by ~3 °C and load peaks by 5–7 °C compared with a bare‑metal contact.
2026 Trends: New Materials, GPUs, and Cooling Challenges
Latest CPUs and GPUs
The Ryzen 9 9950X3D’s 3D‑V‑Cache adds a second cache die beneath the CCD, but it does not change the IHS dimensions. Intel’s 13th‑gen Core series uses an LGA 1700 socket with a larger IHS to accommodate higher TDPs. Both chips demand a paste that spreads easily and stays stable across more than 200 °C of thermal cycling.
Modern Motherboards and VRM Cooling
Boards such as the Asus Crosshair X870E Hero and Asus ROG Strix Z690‑E Gaming Wi‑Fi feature dense VRM arrays that run hot under overclocked loads. Phase‑change pads like Honeywell’s PTM7950 are becoming standard for VRM heat spreaders, but the CPU IHS still relies on conventional paste for the best thermal bridge.
Emerging Thermal Pad Technologies
Phase‑change pads melt at ~60 °C, turning into a low‑viscosity liquid that fills gaps like paste, then solidify when idle. Reviews from Gamers Nexus and Linus Tech Tips show a 1–3 °C gap between PTM7950 and top‑tier oxide pastes on an RTX 5080 GPU, making pads a viable alternative for memory and VRM modules.
Tools & Materials Checklist
Recommended Pastes (updated conductivity figures)
- Arctic MX‑4 – classic, non‑conductive, 8.5 W/mK [1].
- Arctic MX‑7 – 8.5 W/mK [2], ultra‑fluid, no spatula needed.
- Thermal Grizzly Hydronaut – 11.8 W/mK [3], high‑density ceramic particles.
- GEEKTC GT‑6530 – budget‑friendly, 5.8 W/mK.
Thermal Pad Alternatives
- Honeywell PTM7950 – phase‑change, ~1 °C hotter than premium paste on VRMs.
- IC Diamond Graphite Pad – excellent for M.2 SSDs, reusable.
Cleaning Supplies
- Arctic MX‑cleaner wipes (90 %+ isopropyl alcohol).
- Lint‑free microfiber pads.
- Non‑static tweezers for die‑exposed GPUs.
Step‑by‑Step Guide: How to Apply Thermal Paste
Prepare the CPU/GPU and Cooler
- Power down, unplug, and ground yourself.
- Remove the existing cooler. If any paste remains, dampen a lint‑free wipe with 90 %+ isopropyl alcohol and clean the IHS until it shines.
- Inspect the cooler base for scratches; a smooth surface ensures uniform contact.
Apply the Paste (Pea, X, Line, Full‑Spread)
Choose a pattern that matches the size of the IHS. For a 35 mm Intel LGA 1700 die, an X pattern (~1 cm per arm) guarantees corner coverage. On a compact GPU die, a pea‑sized dot (≈0.2 g) is sufficient.
- Pea method: place a single grain in the centre; the cooler’s pressure spreads it outward.
- X or cross pattern: two diagonal lines intersecting in the middle; best for large heat spreaders.
- Full‑spread (buttered toast): use a thin card only if the paste is very viscous; not recommended for fluid MX‑7.
Arctic MX‑7’s documentation advises against a spatula because its fluidity can trap bubbles when manually spread (source).
Re‑install the Cooler and Verify Contact
- Align the cooler’s mounting brackets with the socket’s screw holes.
- Apply even torque: for LGA 1700, 6 Nm per screw is a good baseline to avoid IHS warping.
- Secure the cooler, then run a 30‑minute all‑core stress test (Cinebench R23) and record the steady‑state average temperature (source).
Advanced Techniques and Variations
Using a Spreader vs. Hand for Fluid Pastes
When dealing with ultra‑fluid compounds like MX‑7, let the mounting pressure do the work. If you prefer a hand‑spread, use a soft silicone tip and apply gentle, circular motions to avoid air pockets.
Applying Paste on VRMs and M.2 Slots
VRM heatsinks often have uneven surfaces; a thin layer of PTM7950 is easier to apply than paste. For M.2 SSDs, cut a custom‑shaped pad from an IC Diamond Graphite sheet to match the controller’s footprint.
Dealing with Excess Paste
If paste squeezes out around the IHS, wipe it away with an alcohol‑dampened cloth before the cooler fully seats. Excess does not dramatically raise temps, but it can cause pump‑out over time (source).
Paste vs Pad: Which Is Better for Your Build?
| Metric | Thermal Paste | Thermal Pad (Phase‑Change) |
|---|---|---|
| Peak Conductivity | 8.5 W/mK (Arctic MX‑7) | ~5.5 W/mK (PTM7950) |
| Longevity | 3‑5 years before dry‑out | 7‑10 years, no pump‑out |
| Ease of Installation | Requires cleaning, careful dot | Cut‑and‑stick, no mess |
| Cost (per unit) | ≈ £8 for 4 g tube | ≈ £12 for 25 mm × 25 mm |
For CPUs and GPU dies, paste still wins by a few degrees. For VRMs, memory chips, and hard‑to‑reach surfaces, a phase‑change pad offers comparable performance with far less maintenance.
Common Mistakes & Troubleshooting
Over‑application and Spillage
Too much paste leads to pump‑out and can coat the motherboard socket. If you see a white residue on the socket after removal, clean it immediately with an alcohol wipe.
Air Bubbles and Uneven Layers
Air pockets are most common when a spatula is used on fluid pastes. Let the cooler’s pressure spread the compound, and verify with a visual inspection of the IHS after removal (the paste should be uniform, no globs).
Re‑application after Thermal Throttling
If temperatures creep up after weeks of heavy use, re‑paste. A 30‑minute stress test will reveal whether the new layer restored the original thermal envelope.
Additional Best Practices
Storage & Shelf Life
Unopened tubes keep their rating for up to three years when stored in a cool, dark place (below 25 °C). Once opened, reseal tightly and use within six months to avoid viscosity changes.
Ambient Conditions for Benchmarking
Maintain room temperature at 21 °C ± 0.5 °C and keep humidity below 50 % for repeatable results. Small variations in ambient temperature can shift reported CPU temps by up to 2 °C.
Monitoring After Installation
After the first stress test, log idle, load, and peak temperatures for at least three runs. If the load peak exceeds the expected range by more than 3 °C, double‑check the paste spread and cooler torque.
Best Practices & Checklist
- Maintain ambient temperature at 21 °C ± 0.5 °C for benchmarking consistency.
- Use 90 %+ isopropyl alcohol and lint‑free wipes for cleaning.
- Apply a pea‑size dot for chips ≤ 30 mm, X‑pattern for larger dies.
- Mount cooler with repeatable pressure; avoid overtightening.
- Run a 30‑minute Cinebench or Prime95 test and log steady‑state temps.
- Replace paste every 3‑5 years, or sooner if you notice a sustained temperature rise.
- Store unopened tubes in a cool, dark place; reseal opened tubes tightly.
- Document torque values and paste pattern for future reference.
Who Is This Best For? (Personas Table)
| Target Persona | Recommended Option | Key Reason & Real‑World Benefit |
|---|---|---|
| Novice Builders | Arctic MX‑4 + pre‑cut PTM7950 pads | Easy‑to‑apply, non‑conductive, forgiving if you over‑apply. |
| Enthusiast Overclockers | Arctic MX‑7 + X‑pattern | Ultra‑fluid, fills tiny gaps, yields 3‑5 °C lower peaks on 13900K. |
| Professionals & Data Centers | Thermal Grizzly Hydronaut + phase‑change VRM pads | Stable under 24/7 load, minimal pump‑out, pads reduce maintenance cycles. |